You know what I can definitively say after consulting and reviewing over 500 websites?
You’re letting your content go to waste.
Yes, you. You and a ton of other sites that range from 100 monthly visitors to 1,000,000.
You’re sitting on a goldmine of potential new traffic and subscribers through your content. But I bet you’re doing nothing with it.
Case in point: Go back to one of your posts from a year ago. Have you:
-
Done an SEO audit to get more organic traffic to that article?
-
Created a content upgrade to offer to those readers?
-
Set up specific email capture tools for that article?
-
Promoted that article on social media in the last couple months?
Probably not.
But don’t think I’m standing on my soapbox, pointing an accusatory finger at you while a rose-scented flatulence escapes my backside.
Sumo is guilty of this, too.
We’re trying to fix it, and I guarantee it’s something you should fix, too. Because you invested too much time into writing those articles to let them sit around, forgotten.
So I’m going to give you the exact step-by-step plan we use at Sumo to turn our old content into high traffic monsters that rake in the opt-ins.
I only ask one thing. Just tweet "@sbestor15 is the Bob Villa of DIY content" (EDITOR’S NOTE: Please don’t).
Awesome. Let’s do this.
Step One: Embrace The Loving Touch of SEO
Step Two: Add Value With A Content Upgrade
Step Three: Building An Email-Generating Machine
Step 4: Send It Out Into The World (Again)
Step One: Embrace The Loving Touch of SEO
Let’s be real. You don’t want your articles to die. You don’t write them, hit publish then say "Wow, glad to flush that turd down the content toilet."
You want sustained traffic to your article. Because this is probably what the majority of your articles look like when you published them:

Traffic when you publish, but nothing after that. I’d bet what you really want is this:

That’s sustained traffic. You get that kind of traffic from search engine optimization (SEO), or ranking on the first page of The Google (and other search engines).
The crux is this: you published your article already and it isn’t ranking. So how do you turn a dead article into an organic traffic beast?
You do these four things.
1. Dig Up The Right Body
Tool: Google Analytics
Don’t blindly rifle through your old blog posts, picking an article to fix "just because you thought it didn’t get a fair shake."
You need to dig up the right body. What I mean is you need to find the right piece of content to resurrect.
And in terms of traffic, there are four kind of articles you should focus your attention on:
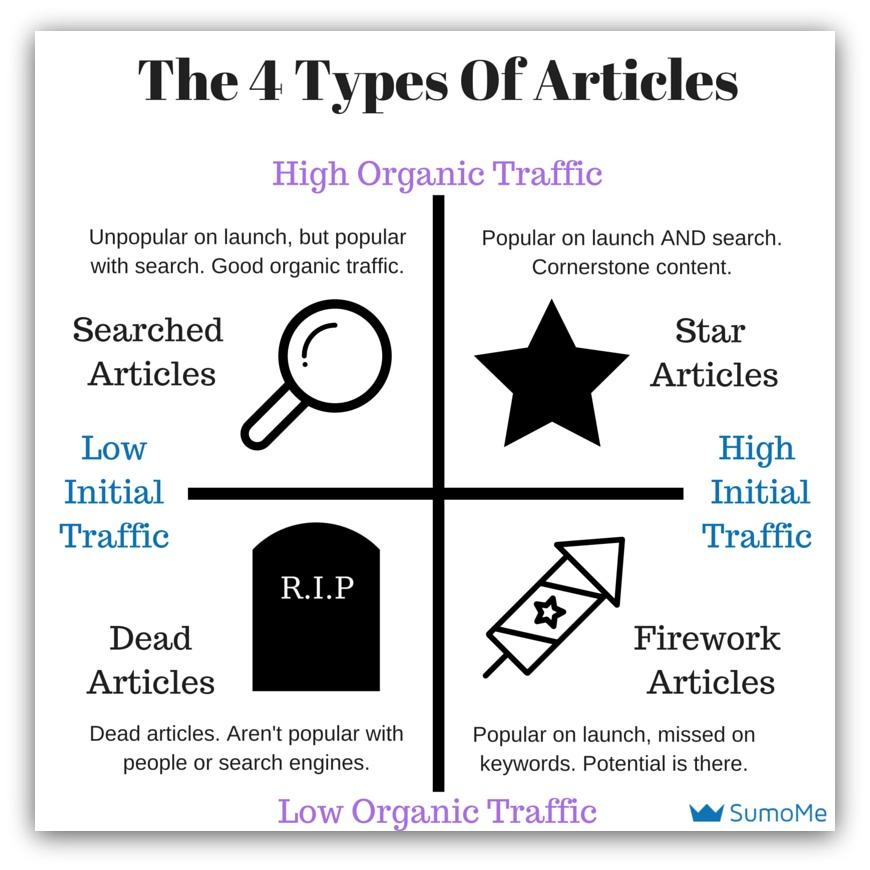
We want to focus on that quadrant with high initial traffic and low current (organic) traffic — aka the Firework Articles. That’s a signal that an article was popular when it was published but didn’t target the right keywords.
These are the easiest kinds of articles to rescue. And it’s really easy to pinpoint what articles fall into this category.
First, visit Google Analytics and click Behavior → Site Content → All Pages. Once you’re there, you need to sort your content. Sumo’s guides follow this URL structure:
https://bdow.com/stories/seo-blog-tips
Every guide falls under the /stories URL. For you, it might be /blog or something similar. You need to find that and input that small section into the search bar in Google Analytics:

You’ll see your articles in the analysis below the bar, with stats like page views, time on site, etc. We’re going to focus on pageviews for this first part.
Head to the top of the page and export your list into a spreadsheet:

Save that spreadsheet ‘cause we’ll use it for part one of our analysis. For part two, we need to stack these total pageviews against total organic pageviews.
Go to Acquisition → All Traffic → Channels and click on "Organic Search." Do the exact same thing you did for the first spreadsheet:

And:

Now you’ll have two spreadsheets: one with regular pageviews and one with organic pageviews. Here’s where the real fun happens.
Dig through those spreadsheets and find the articles that have high (or relatively high) page views but low (or almost non-existent) organic pageviews.
For us, this guide doesn’t crack the top 100 in organic search yet it’s in the top 20 for most-viewed guides. That’s a great indication that we need to tweak the SEO.
The articles you grab from this analysis will be the groundwork for the next couple steps. So make sure you pick articles that were popular and really lack in organic pageviews.
2. See How Popular You (Kind Of) Are
Tool: Ahrefs
No, don’t throw your Facebook friends or Twitter follower numbers at me (574 and 435, btw). We need to look at how popular your blog post in the cybernetic eyes of search engines.
By popularity, I’m talking about where you rank for certain search terms. When it comes to organic traffic, your ranking is your lifeblood.
Not in the top 12 results? Forget about any organic traffic to your page.
The best way to see your article’s popularity? Ahrefs. This is a go-to tool that helps me (and thousands of other marketers) see exactly what keywords are driving traffic.
All you do is head to their site and paste your article’s URL into the search bar:

And you’ll see this:
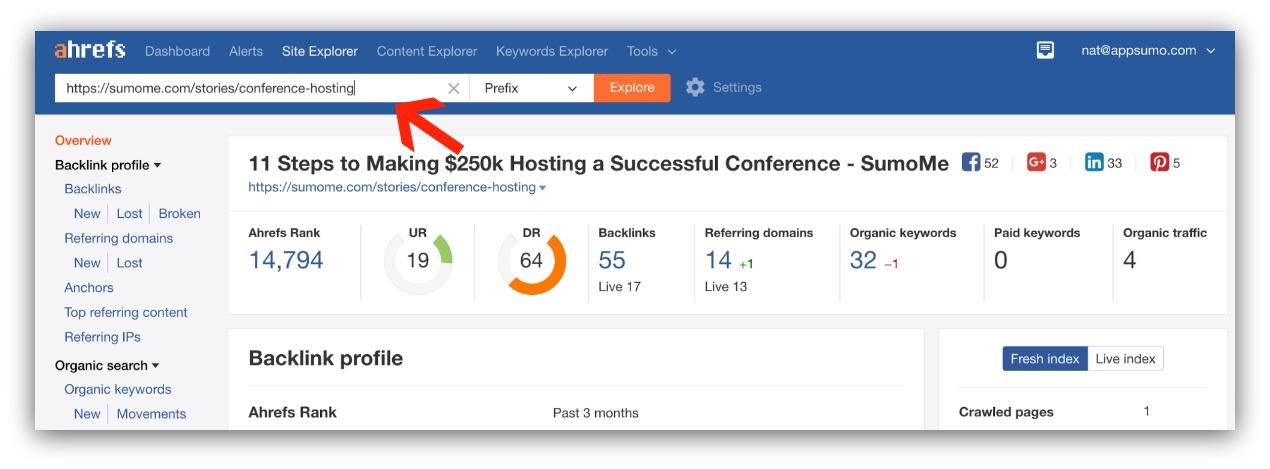
This is the dashboard for how your article performs in organic search. Ignore most of these numbers for now. We’ll just focus on the organic keywords section. Click the "Organic Keywords" link to see this:
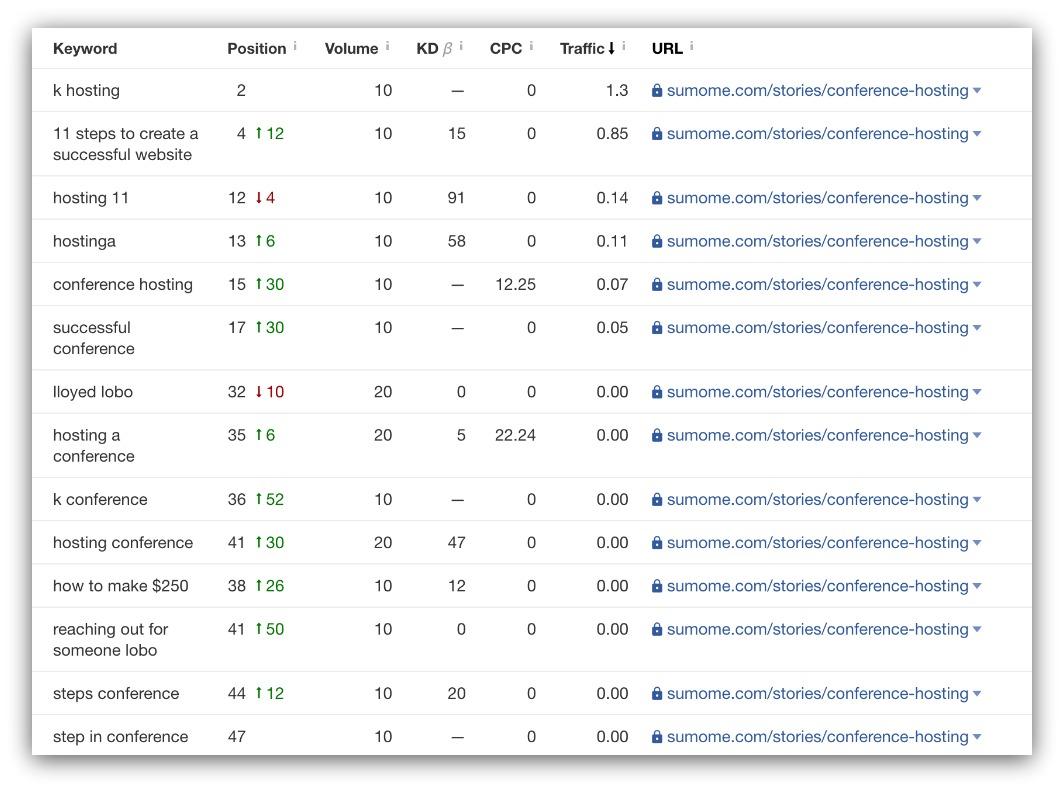
This is a list of every keyword your article ranks for. It seems like a lot of numbers, but you just need to focus on two:
-
Position: This is position where your article currently appears in search engines for that term. For us, we rank in the second position for "k hosting." Trust me, not intentional.
-
Volume: This is the amount of people that search for a term per month. "K hosting" only has 10 searches per month. That’s low for our highest-ranking keyword.
This is not the picture of a popular article. You’re looking to achieve something like this:

Damn, that’s sexy. Our power words guide is in the second position for a keyword that has 4,400 monthly searches.
Those are the kind of results you should strive for. Just by ranking for that keyword we get at least 586 new visitors to our site every single month.
Here’s the point of this whole step. You’re just looking for two things:
-
Keywords With Potential: These are keywords with 100+ monthly searches and it’s one of your top three keywords. With a little work, you can raise this keyword and get more traffic from it.
-
Critical Keywords: Take note if you find a keyword that nets you 20+ monthly visits. That’s a healthy keyword, and you won’t want to change or remove it from your article.
If you have either of these two things, then go to this article and make sure you’re doing all 17 of the suggested tips. Following those tips will help you rank higher and get more traffic from those existing keywords.
None of those criteria apply? No worries.
We’ll get you some traffic by finding the right keyword.
3. Get New Life With A Keyword
Tool: Google Keyword Planner Tool
Some might queue the sad trombone because weak or misguided keyword(s) brought you to this point.
I’m not much of a tromboner. Mostly because I look at it this way: you get new life on your keywords!
You saw what didn’t work. Now you get to cross that off your list and try a new keyword.
To do that, you’ll need the handy Google Keyword Planner Tool. But instead of the guess-and-check approach, I want you to do two things.
Look Through Google’s Eyes
Google sees your page different than you. What you think is important and what Google thinks is important can severely differ.
But from that difference comes new insights. If we strap on the Google goggles (heh) we can actually get keyword recommendations from Google.
Take your URL and paste it in the "Your Landing Page" section of the tool:
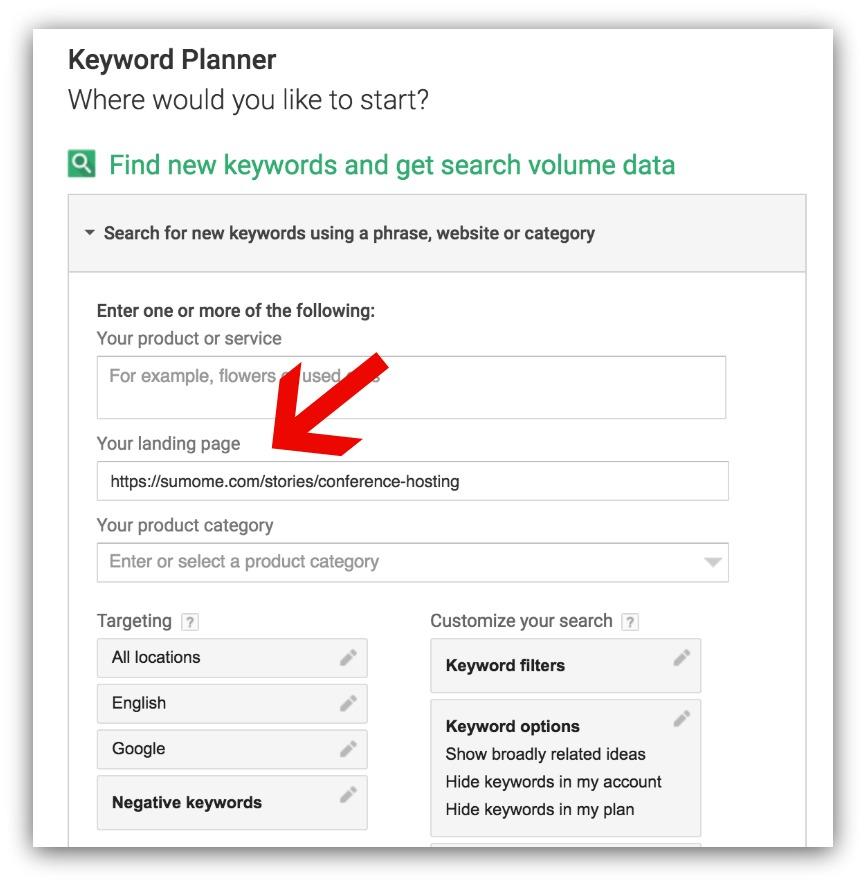
Google then spits out keyword suggestions it believes relates to your page:
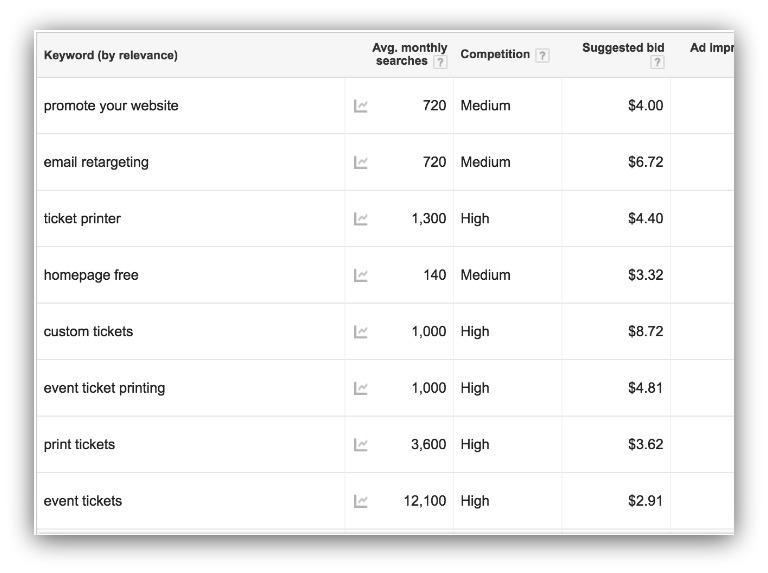
Focus on the monthly searches number.
Ok…it’s not a perfect science. Since that guide is about marketing a conference, Google associates tickets with conferences.
But the guide doesn’t focus on tickets, so that’s not helpful for us. What’s more helpful are "email retargeting" and “promote your website”. Those aren’t the focus of the guide, either. BUT, they’re a step in the right direction.
Write down the keywords that seem most relevant to your page. Then move on to the next step.
Write Down Your Three Biggest Page Topics
Your articles are based around one main idea. But, more often than not, there are central themes that support that main idea.
For this step, read your article and write down those big ideas. For example, I’d write down "conference marketing," “creating successful conference” and “conference website.”
Then I’d take those phrases back to the Keyword Planner Tool and search individually in the "Product or Service" section:
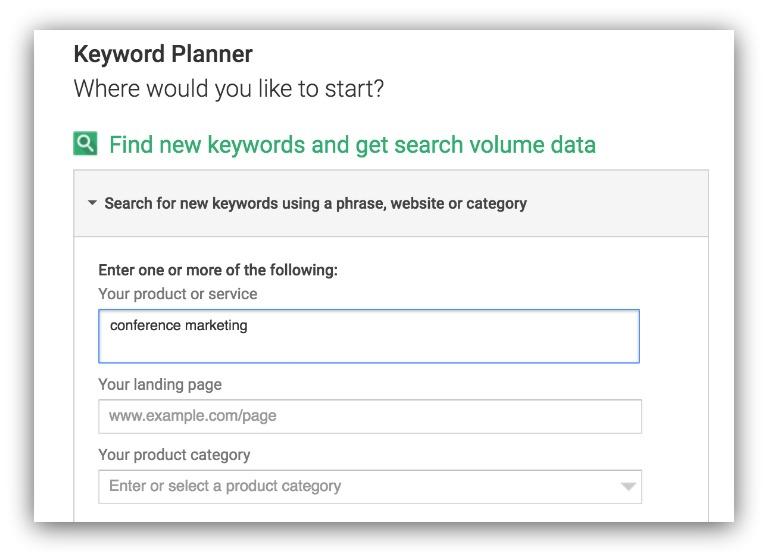
Then you’ll see the monthly searches for that keyword as well as suggested keywords:
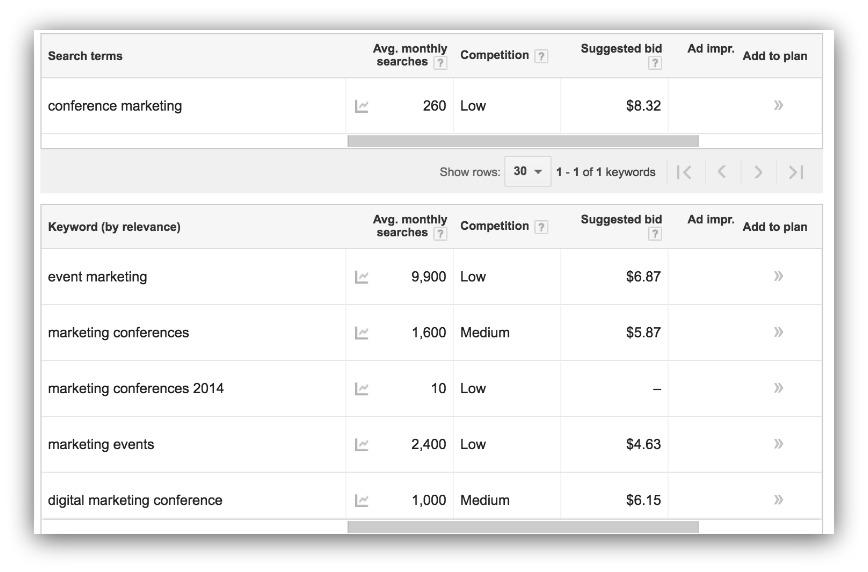
Conference marketing has a low monthly search number, but look at "event marketing" and “marketing conferences!” Those have tons of searches.
(Note: Easy way to know what’s low vs. high, factor in your monthly traffic in your analysis. If you get 10 monthly visits, then anything above 10 is high. If you get 100,000 visits per month, then you’re shooting for over 100 monthly visits.)
Find the keywords with a high number of searches and write them down. Theb, go to Google and search for those keywords for a competition analysis:
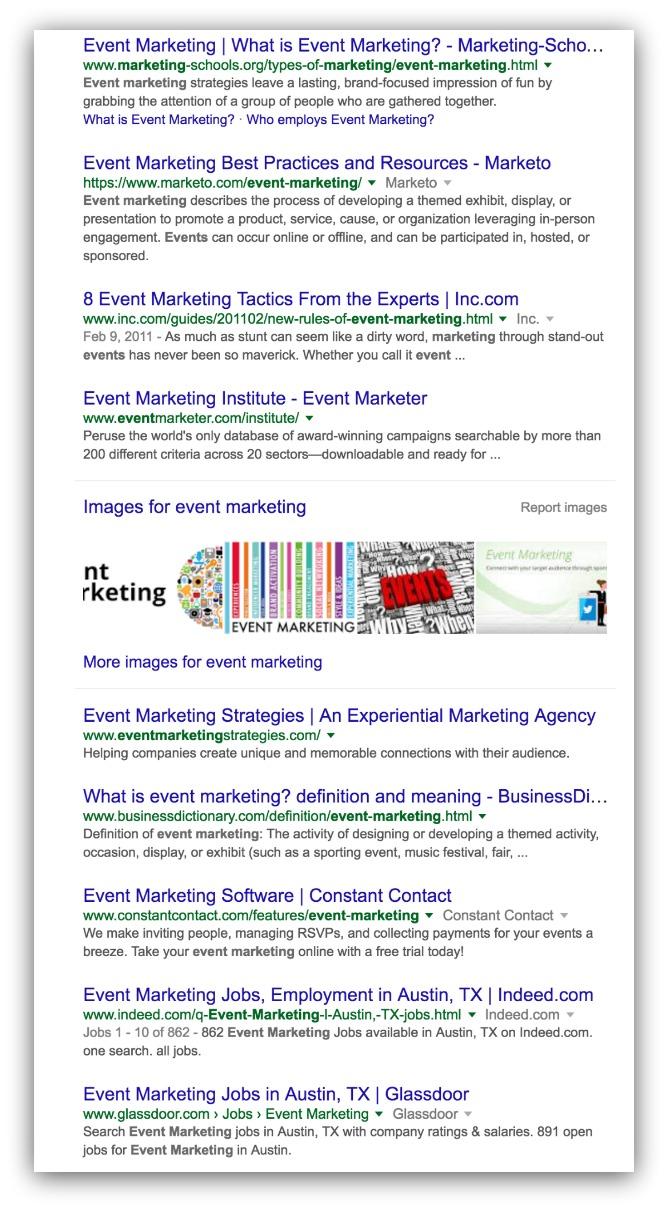
This is the competition for event marketing. If I want my guide to rank on the first page, I need to beat most of these articles. Determine if you can write bigger/better/more relevant content before deciding on a keyword.
Got your keyword? Baller. Let’s facilitate a hookup where that keyword and your page collide.
4. De-Weed The Content Garden
Tool: Your Brain
Your article is a garden rife with weeds. Weeds, in this case, being your old keywords.
We need to weed those nuisances out and replace them with your new, traffic-master keywords.
This is explained in-depth in this guide, but here they are in tl;dr form in case you want to stay right here:
-
Re-work Your Headline: Include your new keyword in the headline. Use it only once, though.
-
Get Your H-Tags In Line: Leverage H-2 and H-3 tags to include your keyword.
-
Edit Your Meta Description: Weave your keyword into your meta description, using one to two times. This is the description people will see when they search in Google.
-
Pretty-Up Your Slug: Your slug is your URL. Include your keyword in the actual URL. *NOTE: *Don’t change your URL without setting up a 301 redirect. More on that here.
-
Nail The First 100 Words: Use your keyword in the first 100 words of your article. It helps search engines quickly see what your article is about.
-
Keywords In The Images: People search for images. Your keyword helps that image appear when they search. Include your keyword in the alt tag of each image in your article.
-
Link: When possible, link to related articles whenever you use your keyword. It helps search engines associate your article with articles using that keyword. Just don’t link-bomb your post.
There are other key steps like getting traffic, building backlinks and publishing consistently. But doing the above steps will lay the foundation for jumpstarting your organic traffic.
TL;DR
-Look for pages with high initial traffic and low organic traffic with Google Analytics.
-See what keywords you’re ranking for with Ahrefs.
-Insert that keyword into your article.
Step Two: Add Value With A Content Upgrade
You know what every Sumo guide has?
Great tips, better humor (tip your Uber drivers), and a content upgrade. Every. Time.
Why? Because a few hours of work on a content upgrade lead to tens of thousands of dollars in revenue each year.

Me, writing every guide.
A content upgrade is an additional piece of content that supplements your article. Check out the content upgrade for this guide.
If you clicked the link above, you also know that a content upgrade is a way to collect an email address. Sometimes they’re great, and sometimes….ahh, not so much..
If you’ve got an article that rakes in the traffic, the next step is leveraging that popularity to grow your business. A good content upgrade — one with a high value proposition — can turn your popular content into revenue-generating content.
No lie, there are tons of content upgrades out there. We’ve actually listed 28 of the most popular content upgrades here, but I’ll give you the six best that you can easily create right now.
1. Spreadsheets
You know those spreadsheets you use to keep track of your business’ activity?
People want those.
I’m horrible with spreadsheets. Yet I know how valuable they are to track success. So it’s almost an automatic download whenever I see a good spreadsheet that helps me out.
Example: Weekly Growth Target Spreadsheet
In our quant-based marketing method guide, we showed how to work backwards from a goal. Quant-marketing is complicated enough, which is why we created a spreadsheet to help you hit your goals:
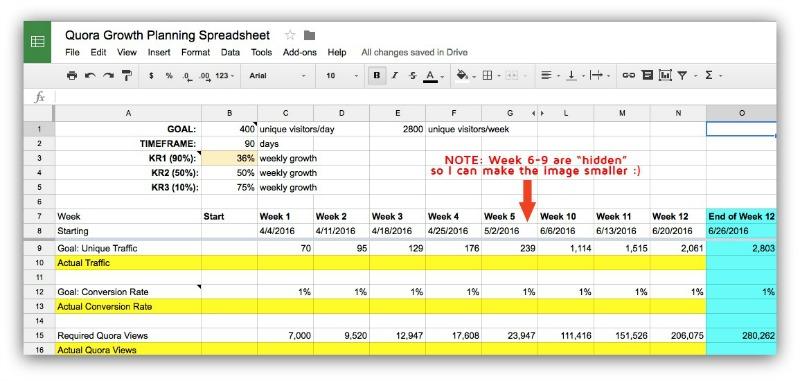
All you do is plug in your goals and the spreadsheet auto-populates certain fields for you. If you’ve got spreadsheet chops, these are powerful kinds of content upgrades.
All you need to create this is Google Sheets. Create your sheet then grab the link to share out.
2. Cheat Sheets/Raw Data
Cheat sheets are the quick and dirty way to summarize what you’ve laid out in your article. A cheat sheet can take the top tips from a long article and present them in a concise way.
Raw data plays off that. If you reference a huge data set (that you can’t fully include in a guide because snore), you can give away that full data.
Example: Making Content Upgrades Cheat Sheet
Let’s get meta on this guide. This is a content upgrade that talks about how to make content upgrades.
The cheat sheet is nine pages of easily actionable steps to create a great content upgrade.
A great tool for creating a cheat sheet is Canva Infographic Maker. It’s a free online tool that makes image-creation ridiculously easy. In fact, this content upgrade was made in Canva.
3. Checklists
The checklist is like the older, stricter brother of the cheat sheet. Where the cheat sheet can be a list or breakdown of what happened, the checklist gives actionable, sequential steps to follow.
The reader should be able to replicate your exact results with the points in your checklist. That’s the allure — the checklist takes a long guide and condenses it into something extremely actionable.
Example: Content Publishing Checklist
Everyone feels nervous before they hit "Publish". You always feel like you missed something or made a mistake.
I’ve been writing professionally for 10 years. So I wrote a guide that dispels the 30 biggest worries or fears a writer has.
Part of that guide was a massive checklist that helps people publish their content worry-free.
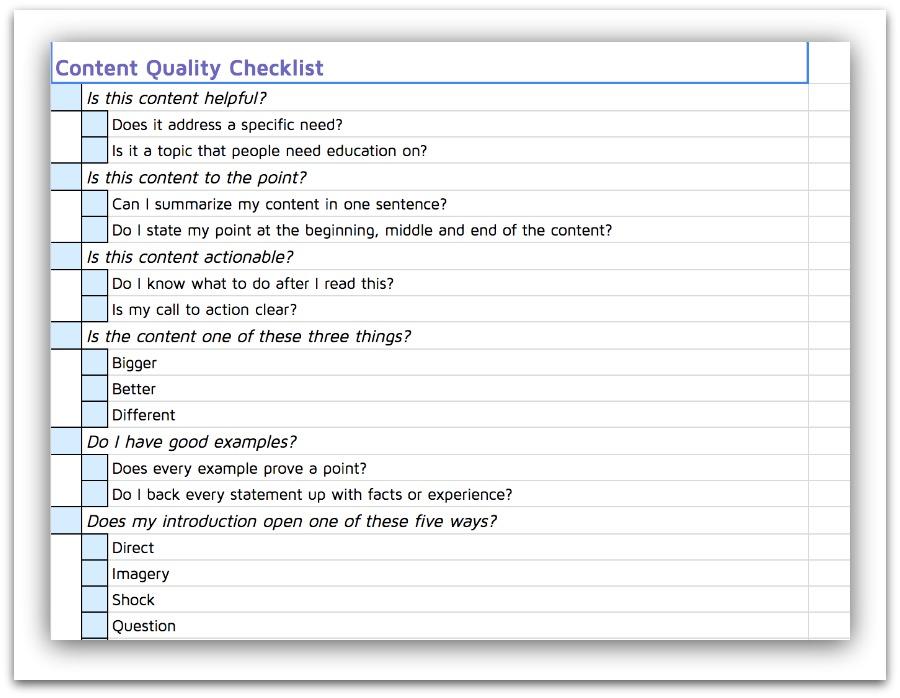
Readers go through the checklist and make sure every point is addressed. Then you can hit the "Publish" button without fear.
There are a bunch of tools you can use for this, though I lean on Google Sheets and Canva (again). In terms of time and learning curve, these two are the best options on the market.
4. Infographics
You know it. I know it. Infographics are taking over. They over index on Pinterest and they’re shared 3x more on social media than any other type of content.
Most infographics will only take five minutes of your time to read. That’s the nice appeal — quick, fun ways to take in information.
Example: A/B Testing Mistakes Infographic
There are 19 big ways A/B testing can ruin a site. That can seem like an intimidating, technical article to dive into.
But an infographic? That shortens the information and makes the article more approachable. We took that approach and transformed our guide into a 19-part infographic.

The infographic was shared and linked to a ton. That helped drive more traffic to our guide long after we published.
While you can always go to Fiverr for an infographic, I’d point you to one of two other options.
The first is Infogr.am. It’s a free service that turns your data and copy into some cool-looking infographics. They have a range of pre-made templates to choose from, too.
The second service that I like is Growth Geeks. For $149 a month you get a bomb infographic with super quick turnaround time. Seeing as I’ve been quoted $600+ for an infographic, this is a great deal.
5. Ebooks
Alright. Ebooks. Here’s the thing about Ebooks.
How many Ebooks are you sitting on right now that you haven’t read?
I bet it’s a lot. It’s so easy to see an 80 page behemoth, download it and promise yourself you’ll read it later.
But you don’t. And that’s why Ebooks remain a badass email-capturing content upgrade. You offer value in a large package for free. That’s kinda hard to pass up — regardless if someone reads it or not.
Some people create from-scratch Ebooks. Others simply repurpose old articles and turn them into full Ebooks. Either way, if there’s value then it’s worth it.
Example: Attracting Social Shares Ebook
Resident badass Sarah Peterson wrote an equally badass guide on how to attract social shares. It’s a 12,000 word guide. Most people see that and automatically admit defeat in the name of time.
Enter the Ebook. Sarah turned that entire guide into a great-looking Ebook full of illustrations and every chapter bound into one document.
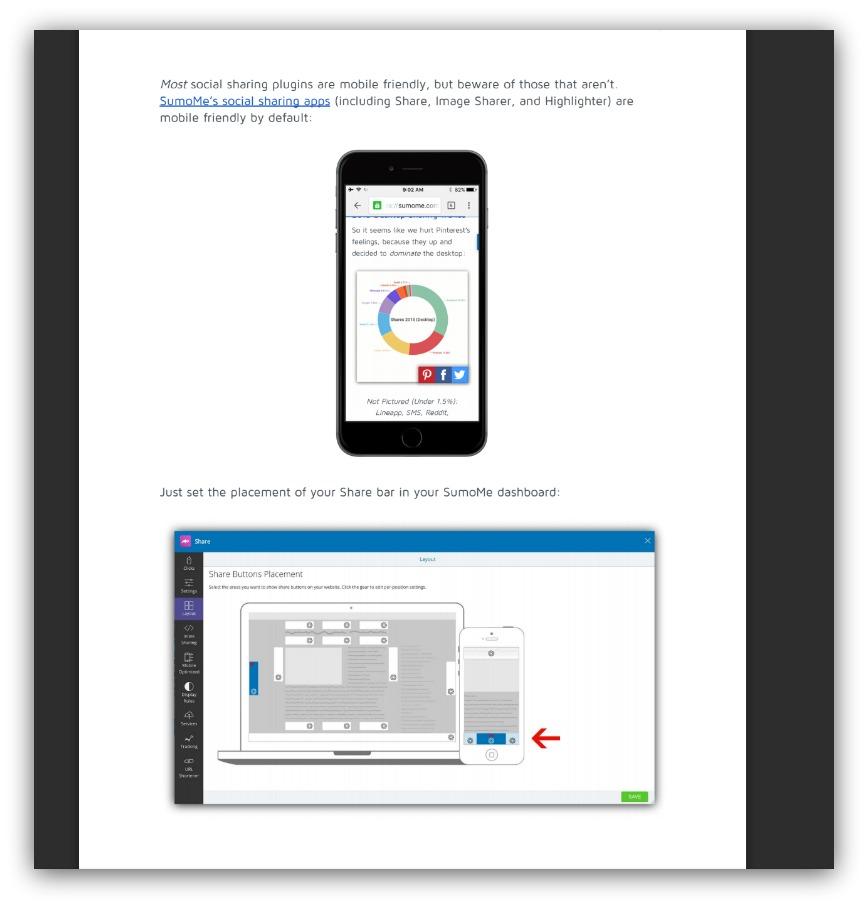
If visitors don’t have time to sit down and read the whole guide, they can download this handy Ebook.
Sarah used Beacon to do this. Beacon lets you upload entire documents, then rearrange them/add images to turn your doc into a beautiful Ebook. And Beacon, like most tools here, is a free service.
6. Videos
Videos are the last and one of the easiest content upgrades you can create. All you need is a camera, you and…well, that’s it.
And that’s why it’s a great content upgrade for anyone starting out. You don’t need design skills or writing chops. You just get in front of a camera and let your stellar knowledge come out your mouth hole.
Honestly, I do this kind of content upgrade all the time. It helps me show things on my screen AND walk people through steps so easily.
Example: How To Create An Attention-Grabbing Pop-Up
Just recently, I wrote an article talking about how the top 1% of Scroll Boxes capture attention. I covered the four unique ways the elite create irresistible pop-ups, and I made a video showing you all how.
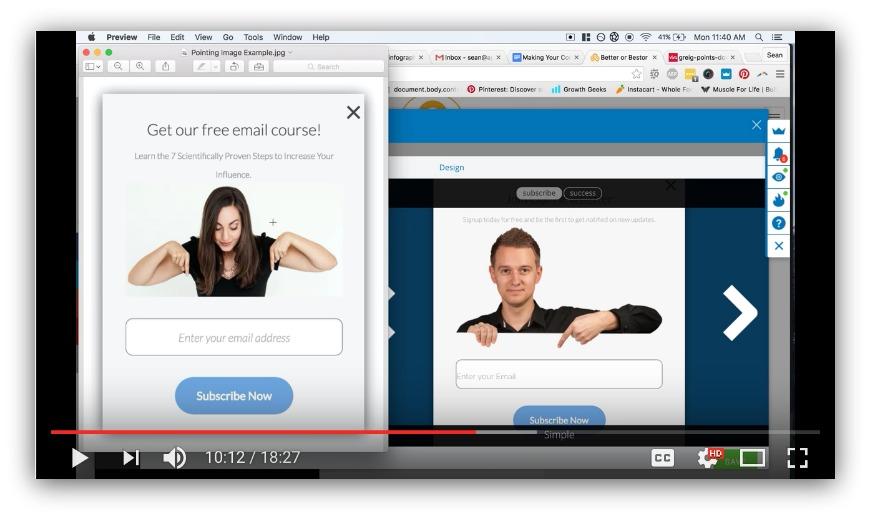
This is almost 20 minutes of me breaking down these Scroll Boxes and showing viewers the exact steps to set up their own pop-up.
All I used was Quicktime Player on my MacBook Pro. If you’re not a Mac user, you can use something like Camtasia to record your screen. If you’re going for off-screen footage, most cell phones have WAY better cameras than webcams or the like.
There are so many more types of content upgrades you can choose from. But sticking to one (or more) of these six well add tremendous value to your article.
But what do you do with this content upgrade? It can’t just sit there. If you want to get more traffic to your site (and sell some stuff) you need to make your content upgrade work as hard as your article.
Aka, it’s time to capture some email addresses.
TL;DR
-Pick an article to create a content upgrade for.
-Choose your type of content upgrade.
-Create the content upgrade and use free, accessible tools for experimentation.
Step Three: Building An Email-Generating Machine
I’m about to reveal an ugly side of marketing that most blogs don’t normally share.
See, most blogs only talk about their successes. Those big wins that make you think they’re the white knight in a sea of Ramsay Boltons (Game of Thrones, anyone?).
But it’s hard to really relate to and learn from those examples. So let me reveal an ugly side of our blog that you can definitely relate to.
On one hand, we’ve got this guide on email subject lines. It consistently brings in the 2nd largest amount of organic traffic to our blog.
On the other hand, there’s this guide on headline formulas. It’s a great piece by Sarah, but it brings in less than half the monthly traffic the email subject lines guide does.
Guess which one grows Sumo more?
It’s the guide on headline formulas.

Marketing in general has sorely lacked in Seinfeld references.
You might wonder how a guide with half as much traffic is more important. It comes down to one simple reason.
We’re capturing email addresses on that guide.
That guide on email subject lines? We don’t have a single opt-in opportunity in sight. Visitors read that guide and then they leave the site.
So while it’s bringing in more traffic, it’s actually doing *less *work for our bottom line.
Obviously, this isn’t good. And I bet a lot of you can relate to this problem. You’ve got a great article that brings in organic visitors yet they aren’t buying your product(s).
Good news. This is easily fixable. Lemme show you the actual steps I’d take to capture more email addresses on this guide (and how you can do the same for your articles).
Option 1: A Good First Impression
You know that content upgrade you created in the last section?
It’s going to make a great first impression on your readers.
Honestly, offering our content upgrade before a guide is how we get most of our opt-ins on the Sumo blog. If you’ve been to any of our guides, you’ve seen this:
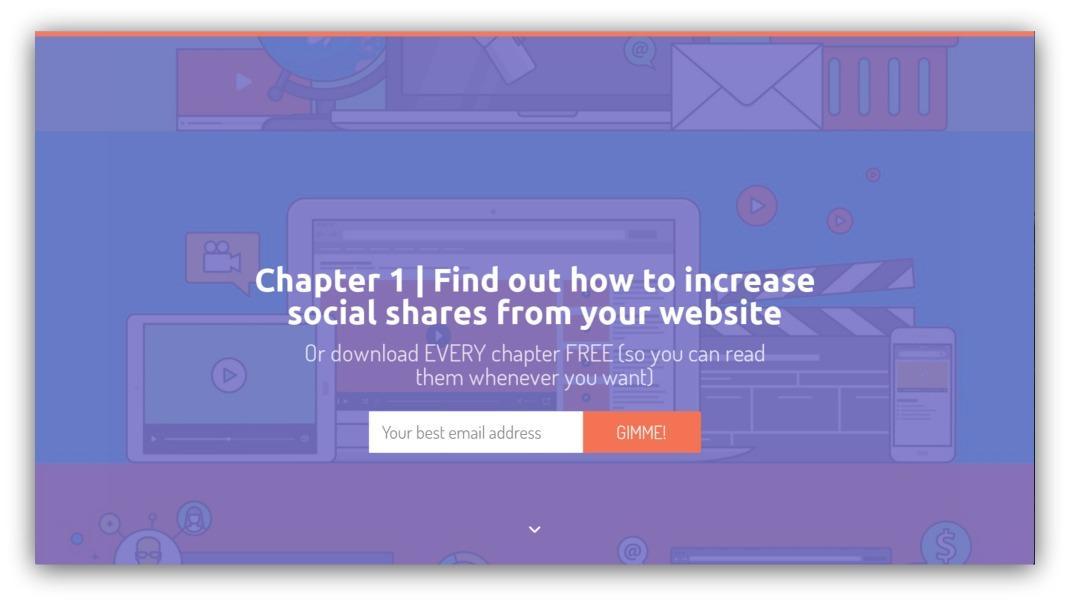
It’s called a Welcome Mat and it appears before an article. This is how you give away your content upgrade and make a great first impression.
You get to customize the background, text, colors, positioning…even A/B test to see which mat works best.
Here’s how it works:
-
You create the mat (takes 5-10 minutes to do)
-
A visitor enters their email address to get your content upgrade
-
After they submit their email address, they’re redirected to your content upgrade.
But I wouldn’t just set one of these up for my guide. I’d also make sure I was collecting only new email addresses. Remember, we’re looking for new marketable contacts, so collecting existing email addresses won’t do us much good.
You don’t need coding knowledge to pull this off. You just have to press a button:

Turning that setting on means your mat only appears to people that haven’t subscribed to your list.
Don’t think we’re being mean by hiding the content upgrade from loyal subscribers. That’s why we’ve got the next option.
Option 2: Capitalizing on Interest
Do you know why you see stuff like this:
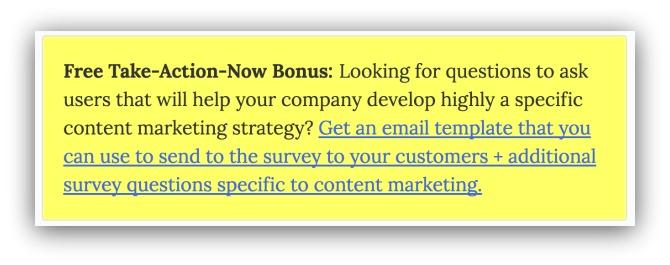
And this:

In articles? It’s because placing these opportunities in existing content helps drive opt-ins.
There’s even one towards the top of this guide. They’re placed strategically in spots where the number of engaged visitors is the highest.
When you click the link in these boxes, you see what’s called a List Builder pop-up:
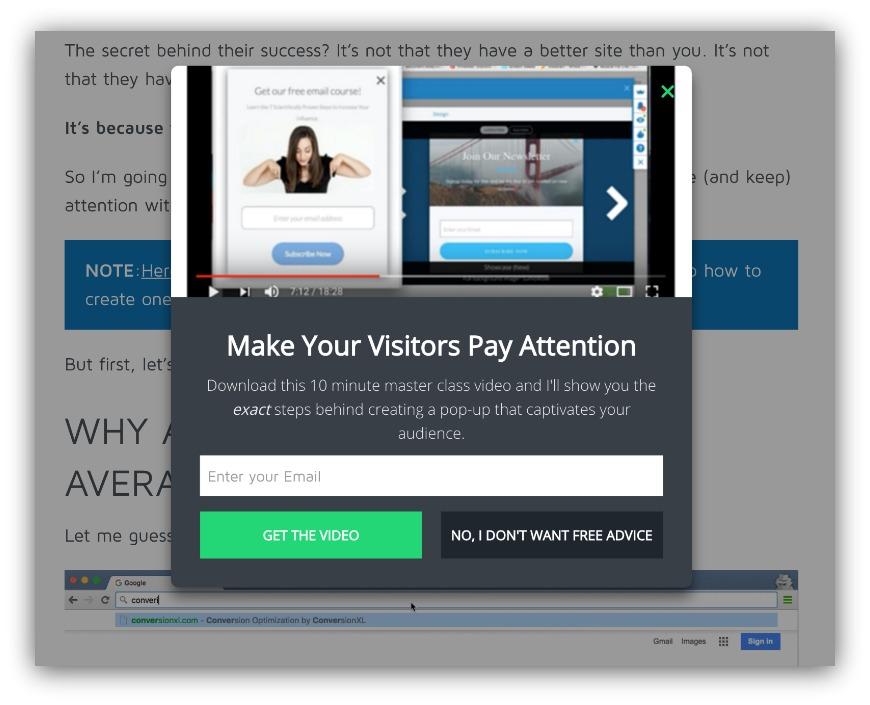
These pop-ups are triggered on a click. So instead of showing a random pop-up, you know this opt-in only appears when someone is interested.
These show up for any reader, too. New or old email address, everyone has the opportunity to claim the content upgrade with this option.
Since these are triggered on clicks, you can essentially use this anywhere. You can put the link behind an image, words and even buttons:

This option goes hand-in-hand with the Welcome Mat. Present the content upgrade up front, then let the reader become invested in the article. Once that happens, they click to see the List Builder pop-up.
Option 3: Live Off The Quality of Your Articles
Time for some real talk. Sometimes your content upgrade will suck.
It’s happened to every writer in existence. You think it’ll be great, but your audience thinks otherwise. Even if you surrounded that content upgrade with a killer article.
The reader might not want your stuff. But they do want more of your expertise (your articles).
That’s where you can take a page from the Wait But Why playbook:
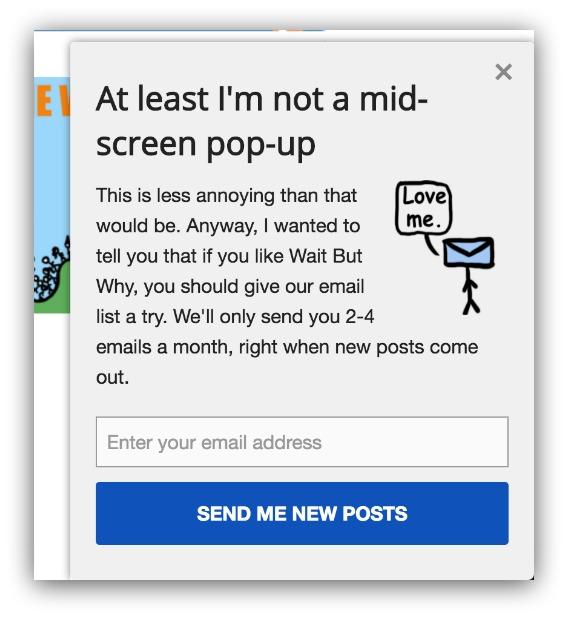
This pop-up appears on the side of their blog and simply asks to sign up to a newsletter. We call this a Scroll Box pop-up, and it appears a certain percentage down the page.
Blogs like Wait But Why like this tool because they don’t necessarily need a content upgrade for every article. They live off the authority of their posts, so they ask visitors to sign up for notifications.
This is one of those "set and forget" options. It can act as a general opt-in opportunity for all your articles. You can set it to show on all your blog posts, meaning you get an instant way to capture email addresses.
Those are the three easiest ways to capture email addresses on your articles. Armed with a content upgrade and these tools, you can make your old content work 10x harder for you.
Now all we need to do is jump start the hell out of your article.
TL;DR
-Set up a Welcome Mat to offer your content upgrade right away to new visitors.
-Set up a List Builder click trigger pop-up to make your content upgrade accessible to everyone.
-Set up a List Builder popup for general blog opt-ins.
Step 4: Send It Out Into The World (Again)
Passive, organic traffic? Check.
Sweet content upgrade? Check.
Tools to collect email addresses for said content upgrade? Checkerino.
Job done? Nah.
You can always get *_more_* traffic.
"But Sean…I already shared my article everywhere once. Surely people will remember and publicly shame me on the social medias?!"
That’s not how psychology works, player. In reality, you actually get a lot of interaction with reshared content. Check out what happened when Buffer reshared their article multiple times:
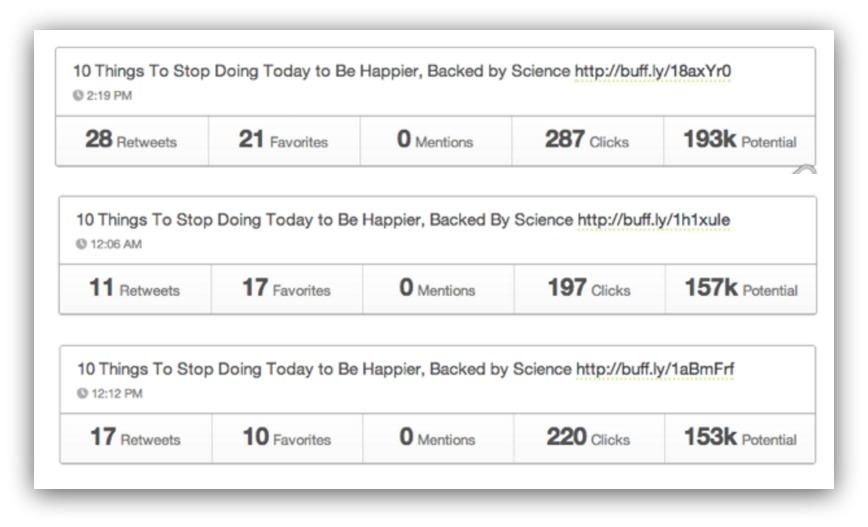
They got almost as many retweets, favorites and clicks on their reshares as they did the original share.
But why does this reshared content get so much interaction? It could be a variety of factors:
-
Get New Followers: If your business is truly growing, then your social media accounts are probably growing, too. Those new followers haven’t seen your old content yet. Though it may feel like republishing, you’re actually sharing to a "new" audience.
-
Hit Different Time Zones: Not all your followers live in the same time zone as you. By resharing at different times, you expose your article to a variety of new readers.
-
Current Events Happen: A new marketing tool or change in landscape can make an old article extremely relevant again.
-
People Just Forget: Name three articles you read a month ago. Hard, isn’t it? With all the content available, it’s easy to forget what you have and haven’t read.
Bottom line — your article can only work as hard as the traffic you send to it. A healthy dose of resharing mixed with organic traffic can help your article really do work.
The two best ways to do that?
1. Read These Guides
Writing about ways to get traffic from every social medium could fill a (small) library. Instead of rehashing ways to do that, I’ll give you these five guides that show how to get crazy amounts of traffic from the four biggest social sources.
-
Get More Traffic From Facebook: Every free strategy to skyrocket your site traffic from Facebook (with a checklist to make it easier). THE essential guide on Facebook traffic, in my opinion.
-
Get More Traffic From Twitter: With 320 million monthly active users, Twitter is a traffic goldmine if you have the right tools and strategies. Like LinkedIn, there are many interesting ways to drive traffic that you might not think of right away.
-
Get More Traffic From LinkedIn: Facebook, Twitter and the rest are crowded and noisy. Sure, LinkedIn is busy too, but it’s a destination for people to connect with peers and learn about their industry. If you’re looking to drive traffic to your B2B blog, this is your platform.
-
Get More Traffic From Reddit: The reddit community is notorious for being both a gigantic, website-crashing, source of traffic and a painfully unwelcoming & fruitless place for marketers. Mastering this channel can be a game-changer for you.
-
BONUS 120+ Ways To Get More Traffic: This guide is packed with examples and details for each tactic, and a spreadsheet to help you decide the best traffic channels to go after.
Reading these guides will help you master each channel and drive insane traffic from your reshared content.
2. Use These Tools
When I think of social media sharing and scheduling, I think of two tools:
Buffer
Buffer is a leader in social media scheduling.
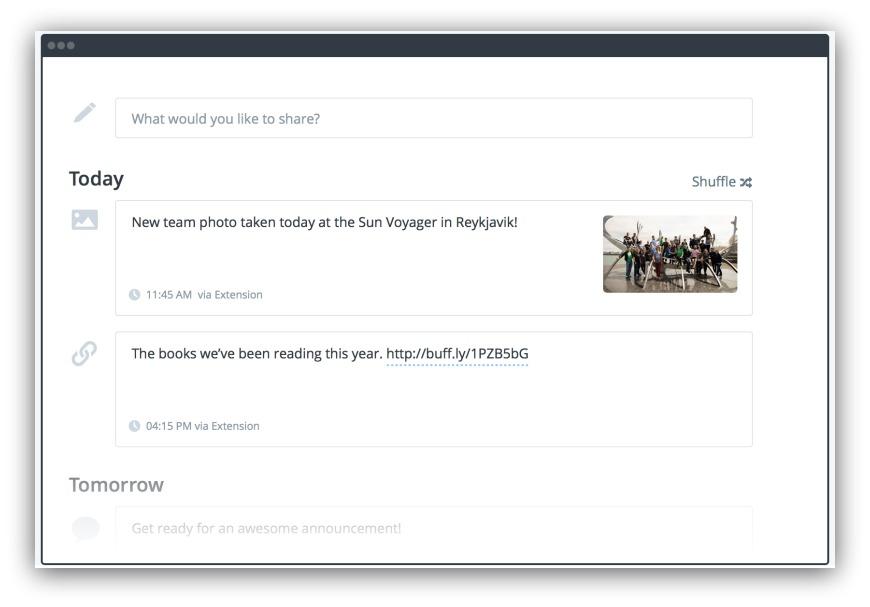
Buffer shares your content at the best possible times throughout the day so that your followers and fans see your updates more often.
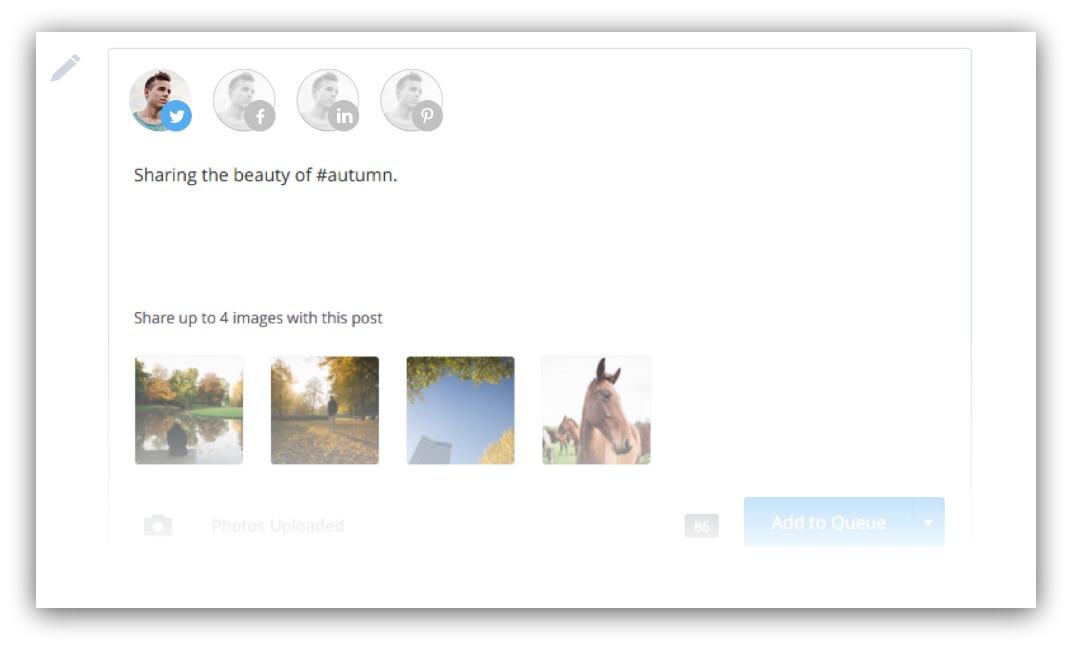
As you add content, you can easily select which of your social accounts you want to post to.
They make it super easy to schedule out your old content for future dates.
Meet Edgar
You may not know about this tool, but it’s a godsend for passively promoting your old content.
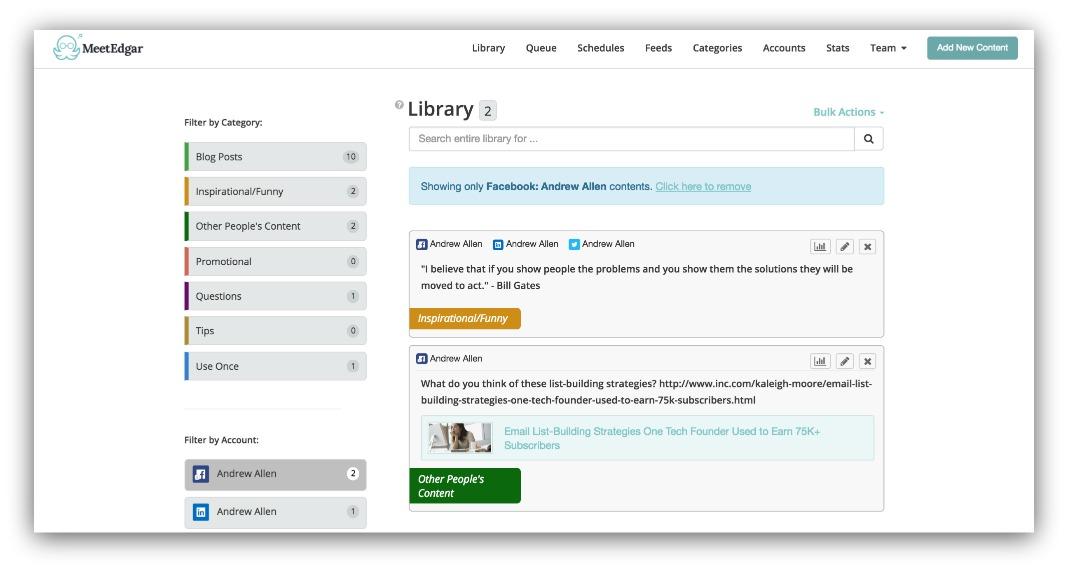
Here’s how it works. You build up a library of posts. You write them just like you would in Buffer. Then, you assign those posts to certain categories you create.
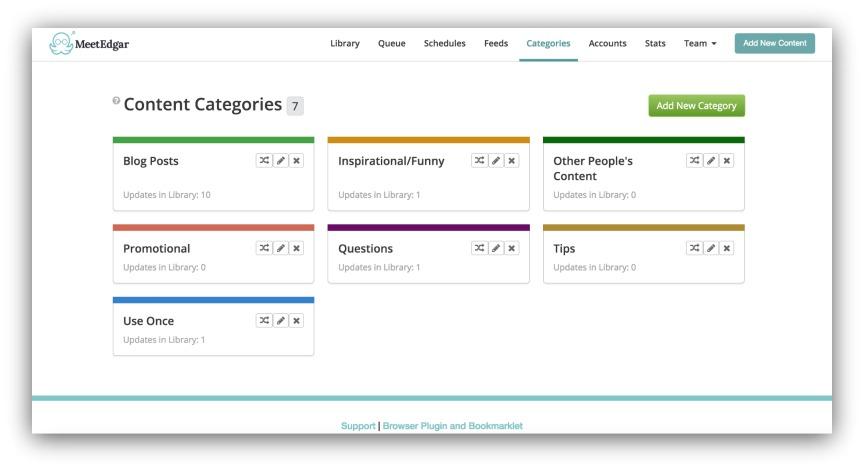
Here’s the cool part. Tell Edgar what types of updates to share at which times. Want to tweet something from the "Blog links" category every Tuesday at 10 am? Done.
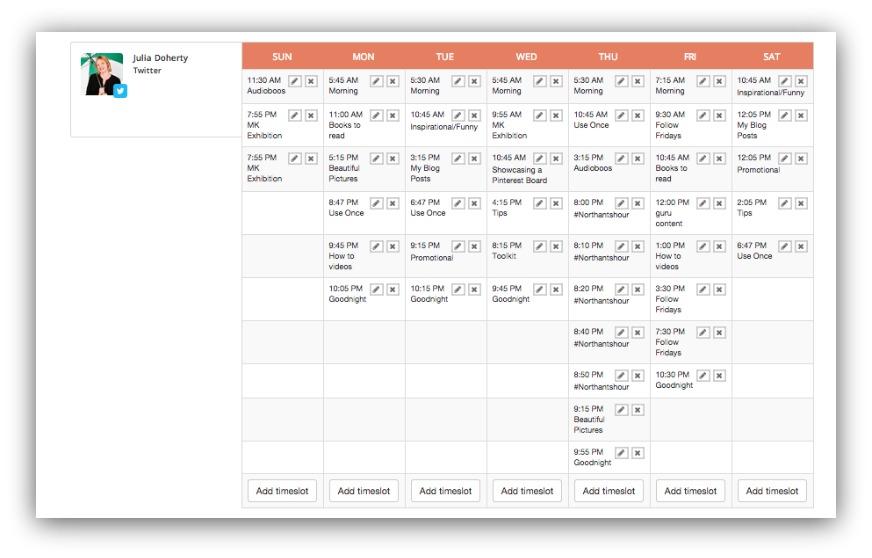
Edgar uses the updates saved in your library to create a queue. After it posts an update, the system puts it back in the library at the bottom of the pile, so it can post it again later when it runs out of new posts.
It’s an amazing solution to help automatically (and continuously) reshare your old content.
Want To Easily Know Where You Are In The Process
You may be in different stages of this process. Maybe your article has plenty of traffic but you aren’t collecting email addresses.
OR you have your email capture tools set up, but your traffic is lacking.
Either way, some of this tips may not apply to your specific article. That’s why I created a flowchart that easily walks you through the process no matter where you are.
Follow this flowchart and you’ll never miss a step in turning your dead content into cornerstone content.

Add A Comment
VIEW THE COMMENTS